Practical HTTP GET and Cache-Control
In this post, I will use a practical example to explain how does the usage of HTTP GET and "Cache-Control" in the HTTP Header really helps to improve a site's responsiveness. This is a practical session, meaning we will be seeing "things" in action, instead of just talking about it casually, defining formal definitions or whatsoever 😛 You can also clone the GitHub repo to follow along or experiment with it too - https://github.com/DriLLFreAK100/http-get-cache-demo
There are already enough written materials out there explaining textbook stuffs like definitions of HTTP GET and Cache-Control, etc. I have included some reference links at the bottom of this post, just in case you are interested to find out more!
Without further ado, let's dig into our topic today! Performance benefits from utilizing HTTP GET and Cache-Control Headers!
Sections:
- Page Responsiveness
- HTTP GET vs POST methods
- HTTP Cache-Control Header - Request vs Response
- Demo
- Conclusion
1. Page Responsiveness
Responsiveness is a huge and ambiguous term for performance in general. It could mean responsive layouts, render responsiveness, request-call responsiveness, etc.
In this article's context, I am really just referring to the latter one, i.e. request-call responsiveness. Example used will be Client application making API calls. If the response is fast, then it's responsive. Otherwise, it is less responsive or unresponsive if it takes forever~
2. HTTP GET vs POST methods
This has already been covered in many other sites and posts. So, I will skip and only mentioning key points that are practically applicable to me day to day as a web developer.
| GET | POST |
|---|---|
| Cacheable by default | Not cacheable by default |
| Limited by max URL characters | No limit on request's data length |
3. HTTP Cache-Control Header - Request vs Response
We can include Cache-Control directive in HTTP Request and also Response's Header. So what's the difference between the two? Where should we really be putting the directive? Request or Response? This was exactly the question that got me started researching and experimenting on this topic.
To start it off, we should really be trying to understand the mechanism or the flow to enable cache happens. Basically, there is only 1 requirement to enable the caching, HTTP GET Response that contains Cache-Control specifying the Max-Age of the resource's "freshness" or how long is the response cacheable.
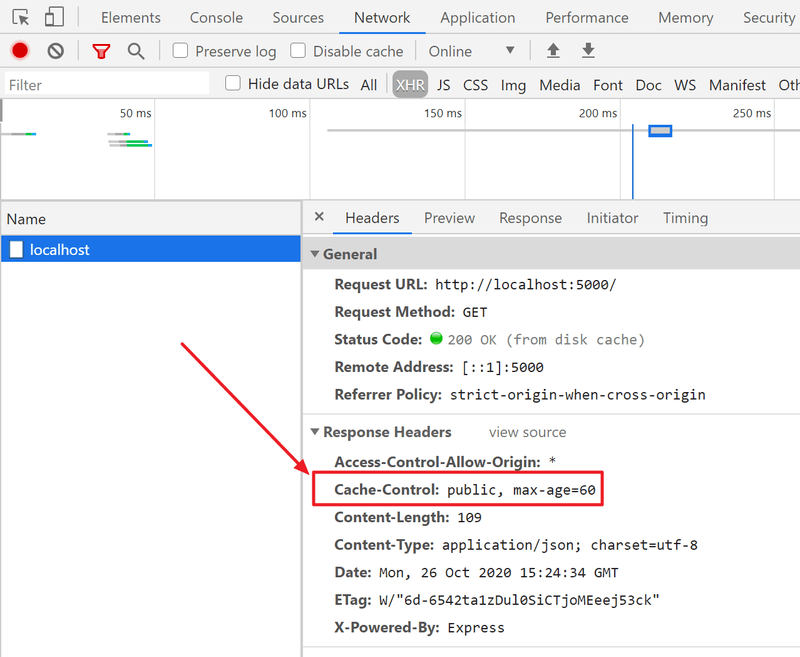
The following is a sample HTTP GET Response Header that contains Cache-Control directive (from the Demo). The Cache-Control in this example contains 2 parts:
- public - Resource can be cached at any cache, i.e. Proxy Cache, CDN Cache, Local Browser Cache, etc.
- max-age=60 - The resource is fresh and cacheable for only 60 seconds (1 minute). After it has expired, client has to request this resource from server again.

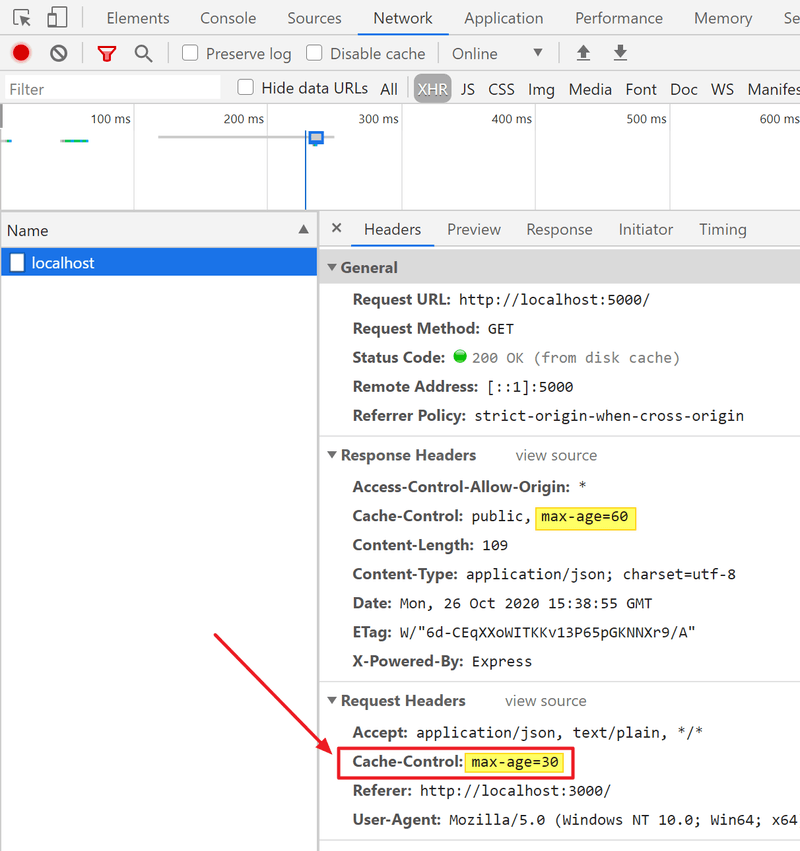
The cache is already working. So, what's up with Cache-Control at HTTP Request? Is it really needed? Well, supposed we have the following HTTP Request Header:

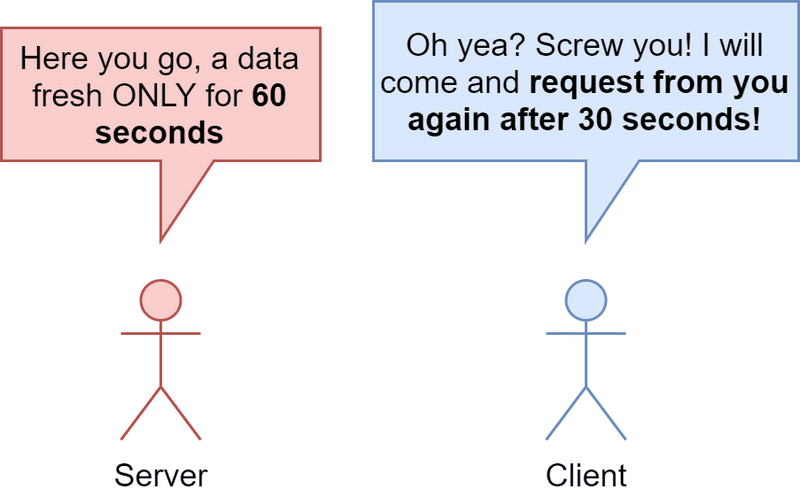
From the image above, Server states that the resource can be kept for 60 seconds BUT Client will sort of ignore it and only treat the resource cacheable for only 30 seconds instead. So, anywhere after 30 seconds, Client will fire a new request to Server even though it hasn't passed 60 seconds yet.

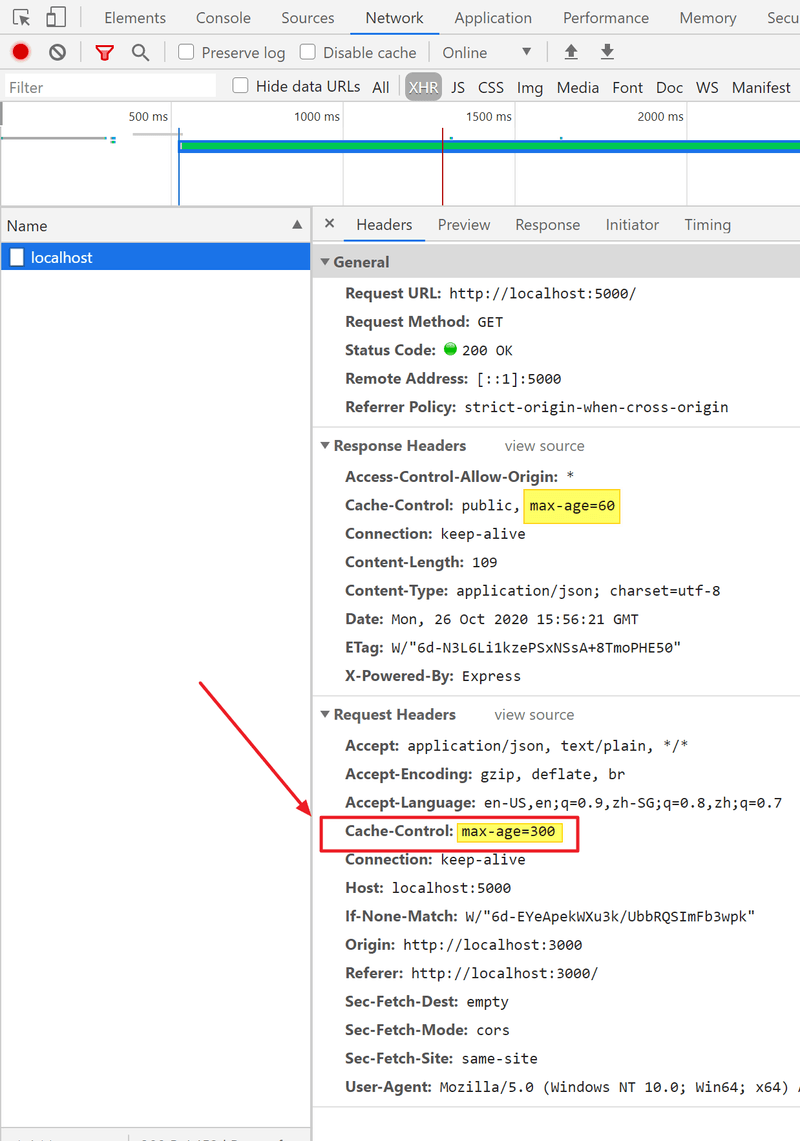
What if the Client includes a Cache-Control that specifies a Max-Age longer than what was specified in the Server's Response?

In this case, the Browser will respect and honor the Server's Response, serving the Client with cache data only for 60 seconds. After 60 seconds, new request will be fired to Server regardless.
4. Demo
For this demo, we will take a look at a sample web application, whereby the Client sends a HTTP GET request to a Server to retrieve data upon every page loads. We have a very basic client (ReactJS) and a server (Node.js - Express) in this demo. You can find the codes on GitHub repo over here.
The following video is the demo application aforementioned to illustrate the power and performance benefits of HTTP GET achieved through its cacheability.
The demo Client is coded in a way that, whenever the page loads, the Client will fire a GET request to the server to retrieve data. Server will only send response after 5 seconds. Hence, the initial wait time. If you pay attention, after the first load, subsequent page refresh are actually super fast. So fast, as if the Client does not even send any GET request to the Server!
So fast, as if the Client does not even send any GET request to the Server!
So, what's the deal here? What happened exactly? Yes, you guessed it! Truth is that, the Client DID NOT actually send any requests to the server for subsequent page refresh. Instead, it receives the response from the Browser's cache (Disk Cache) directly. In other words, there is no Network call involved, hence removed the Client-Server round trip. Big win for performance!
Network Analysis
The following 2 images are observations on the Client's network behaviors via Chrome DevTools > Network tab.
The first one is taken when the page first loads. We can see that the client performs an actual network call to server and waited for a few seconds for the data to be returned.

The second one is taken after refreshing the page. We can see that the data is now being served from "(disk cache)" under the size column. It actually means that the data was retrieved from the Browser's cache, no network call was made to the actual server.
5. Conclusion
In most cases where data seldom changes, we should really be utilizing the HTTP GET method to retrieve data instead of using other methods like POST, PUT, although we can technically. This is because HTTP GET is cacheable by default.
If the resource is specified to be cacheable from the Server (via Cache-Control HTTP Response Header), client application is only required to perform actual request to the server for the first time. Subsequent same requests can be fulfilled by cache stored in the Browser locally until the resource's Max-Age has passed/expired.
This is especially useful for applications that deal a lot with stagnant data, i.e. data that seldom gets updated. I came to realize the real power of this when I was working on Data Analytic Applications at work, dealing with huge historical data especially. Usually, it takes some time (more than 5 seconds) for some APIs to process and return data due to the size of data being reallyyyyy BIG! When user navigates across different pages and come back to the previous page, he/she doesn't have to wait for the data to be loaded all over again, which is very very very handy and good for user experience. A total big win for that!
Use it with care though. In mission critical applications, where data is highly dynamic, using this cache approach will potentially brings disaster and unimaginable bugs to you and your users. So, understand it and use it carefully 😉
References:
HTTP GET:
- https://developer.mozilla.org/en-US/docs/Web/HTTP/Methods/GET
- https://www.w3.org/Protocols/rfc2616/rfc2616-sec9.html
- https://www.w3schools.com/tags/ref_httpmethods.asp